Webflow Image Compression Techniques
Written by
Andy Dao
,CEO
Published on:
September 8, 2025
The Hidden Cost of Unoptimized Images in Webflow
In 2025, page speed isn’t just an engineering metric—it’s the deciding factor between conversion and churn. SaaS users expect instant load times. They bounce the second a Webflow site lags. Google notices too, pushing slow sites down in search.
For most Webflow projects, unoptimized images are the #1 performance killer. Oversized graphics silently drag down speed, trigger poor Web Vitals scores, and chip away at user trust. The result? Lower rankings, lost sales, and disappointed teams.
The fix isn’t just “compress and hope.” This guide details proven Webflow image compression techniques—step-by-step, tool-by-tool—to cut file size, protect visual quality, and drive measurable SaaS growth.
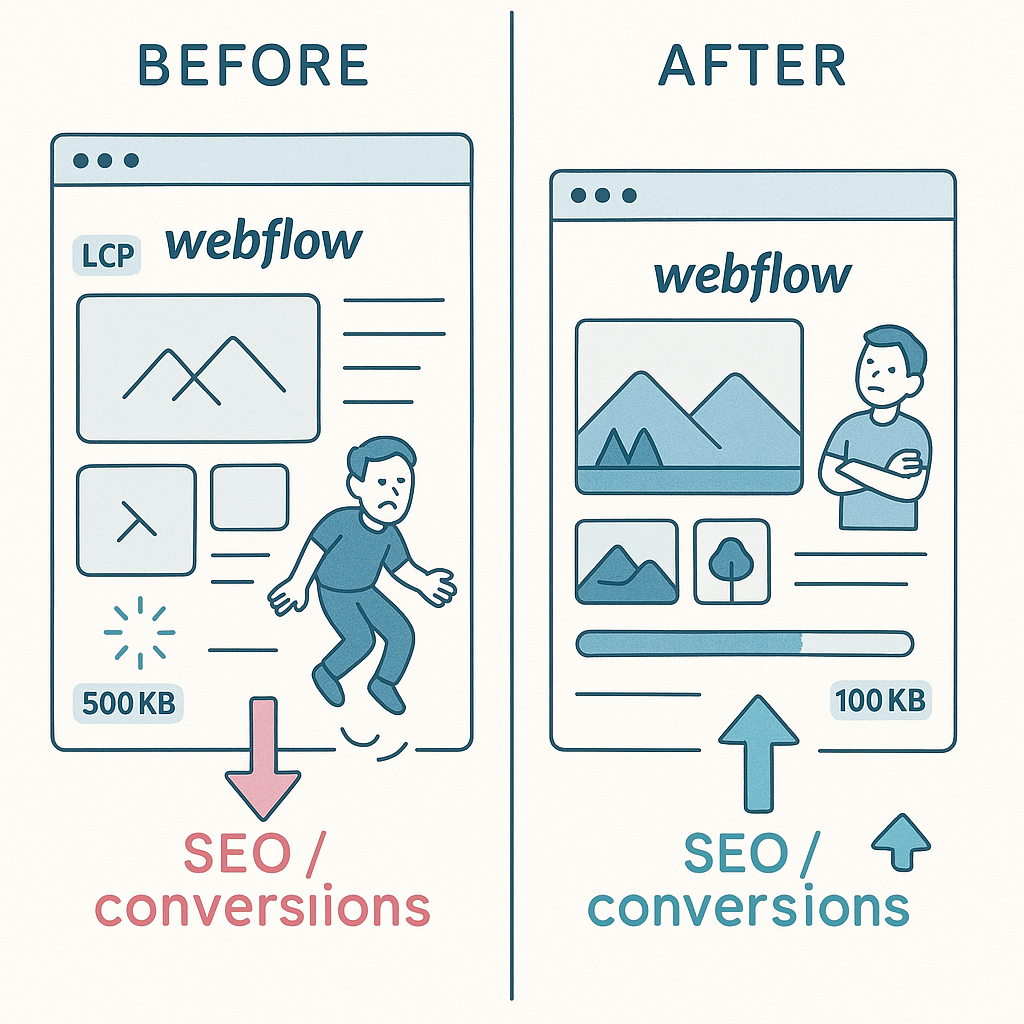
Hero visualization: before-and-after effect of image compression on a Webflow SaaS landing page—faster loads, better user retention and improved SEO.
Why Image Compression Matters in Webflow
Speed is non-negotiable for SaaS growth. Multiple studies (see Google's benchmarks) confirm:
- Every 1s delay in page load drops conversion rates by up to 20%.
- 53% of mobile users leave if load time exceeds 3 seconds.
- Heavy images are the top culprit—often >50% of total page weight.
Webflow and Google Core Web Vitals:
- Largest Contentful Paint (LCP): Slow images delay LCP, hurting rankings and UX.
- CLS & FID: Poorly optimized graphics impact visual stability and interactivity.
Webflow makes site building visual, but its native exports aren’t always image‑optimized. This means performance—your SEO, your demo conversions, your UX—rides on how you prep images before upload.
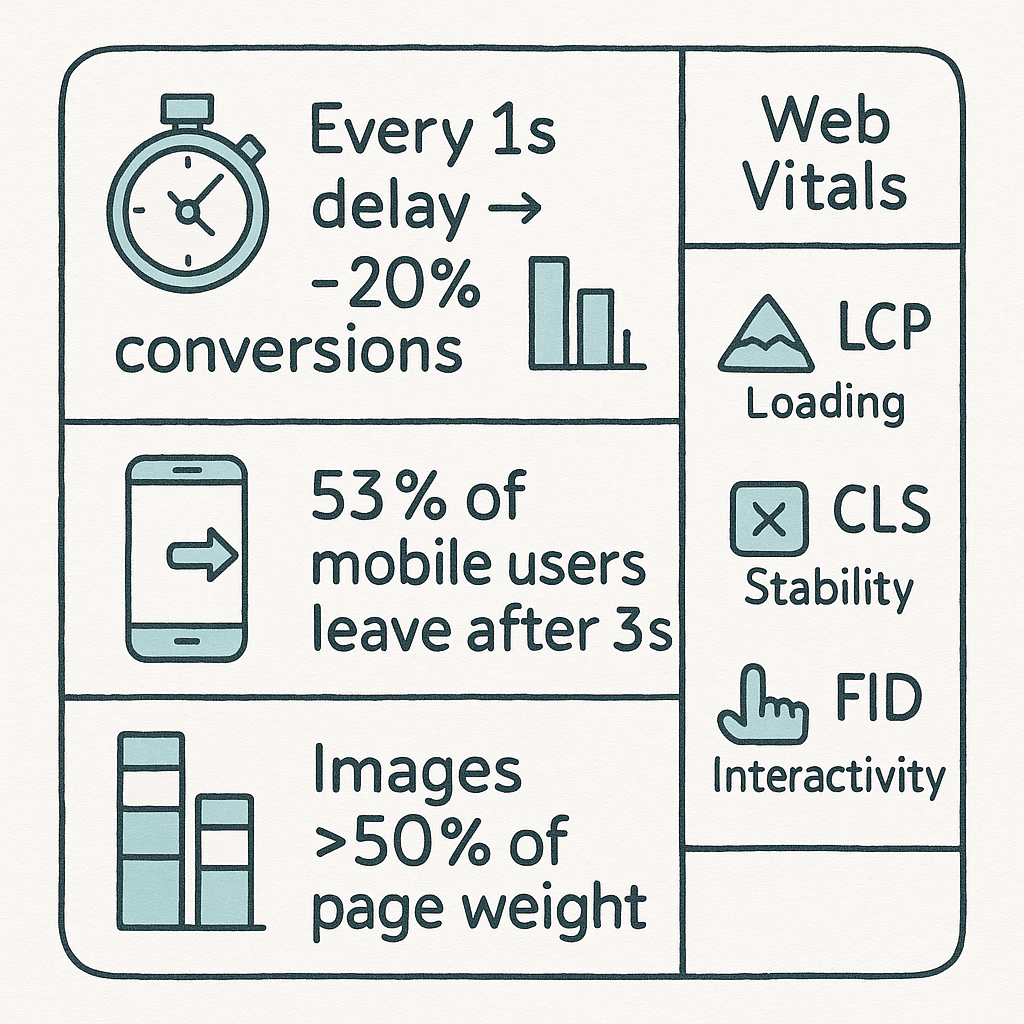
Critical stats: how unoptimized images hurt conversions and mobile retention — essential metrics for Webflow performance and SEO.
Understanding Webflow’s Built-In Image Handling
Webflow streamlines image management, but it’s not a full-stack optimizer. Here’s what happens inside:
- When you upload: Webflow generates multiple device-friendly renditions (e.g. @2x for retina, different widths for responsive).
- Supported image formats: JPEG, PNG, GIF, SVG, plus WebP (as of 2024 update).
- Automatic optimization: Some lossless/lossy compression and optional lazy loading for non-critical images.
But: Webflow does not aggressively lower file sizes during upload. Large originals remain heavy, and advanced formats (like AVIF or deeply compressed WebP) require manual prep.
Best Image Formats for Compression & Quality in Webflow
Choosing the right image format is the first lever for lossless image optimization in Webflow. Each format has tradeoffs for quality, compression, and browser support:
| Format | Best For | Compression | Transparency | Webflow Support |
|---|---|---|---|---|
| JPEG | Photos, gradients | Lossy, small sizes; limited lossless | No | Yes |
| PNG | UI, icons, logos with transparency | Lossless, larger than JPEG | Yes | Yes |
| WebP | Photos, UI, most uses | Lossy/lossless, ~30% smaller than JPEG/PNG | Yes | Yes (2024+) |
| SVG | Simple logos, icons, vectors | Text-based, ultra small | Yes | Yes |
| AVIF | High-res photos, next-gen SaaS graphics | Best compression, modern browsers | Yes | Manual support only |

| Format | File Size (KB) | Load Time (ms) |
|---|---|---|
| JPEG (quality 80%) | 280 KB | 625 ms |
| WebP (quality 80%) | 165 KB | 390 ms |
- Photos: Use WebP wherever possible. Fallback to JPEG for legacy browsers.
- UI elements: SVG (for icons/logos), optimized PNG/WebP for sharp transparency.
- Animations: Modern video (MP4/WebM) or sprite-based SVG over GIFs.
Step-by-Step Image Compression Workflow for Webflow
To improve Webflow site speed with image compression, use this battle-tested workflow. It scales from one-off images to batch assets for a full SaaS site rebrand.

Step-by-step image compression workflow for Webflow — tools and actions from pre-upload optimization to auditing post-deployment.
A. Pre-Upload Optimization: Desktop Tools
- TinyPNG: Drag-and-drop for PNG/JPEG/WebP, preserves transparency. See tinypng.com.
- ImageOptim (Mac): Batch compresses, strips metadata, best for offline workflows. imageoptim.com/mac
- Squoosh (Browser): Advanced, in-browser. Choose format, tweak visually. squoosh.app
How to compress:
- Drag images to tool interface.
- Review preview—check for blur/artifacts.
- Select quality settings (aim for 60-80 for JPEG/WebP).
- Export/download optimized versions.
B. Online Tools & Browser Compressors
- Compressor.io, Kraken.io: For large one-off files, aggressive compression, or exotic formats.
- CloudConvert: Bulk conversion—easily switch PNGs to WebP or AVIF at scale.
C. Batch Processing for High-Volume SaaS Sites
If your library is hundreds or thousands of assets, desktop tools are slow. Automate:
- ImageMagick (CLI):
mogrify -path export_folder -resize 1600x900 -quality 75% -format webp *.jpg - XnConvert: Free batch GUI, supports all major formats/filters for drag-and-drop multisite campaigns.
- Photoshop Actions: For teams standardizing image pipelines inside Adobe CC.
feature-dashboard-v2.webp) for SEO and asset management.
D. Webflow Asset Upload & Settings
- Upload only optimized images. Drag files into Webflow's Asset Manager or inline into the Editor.
- Check Webflow-generated sizes: Webflow creates responsive variants; verify that original images are compressed enough to minimize each version.
- Lazy loading: Enable for all below-the-fold images via Webflow image settings for LCP improvements.
E. Maintaining Transparency & Sharpness for UI Images
- Use SVG for icons and logos. Infinite scaling, no blurring, tiny file sizes.
- Optimize PNGs/WebPs for interface elements requiring transparency—never JPEG for these.
- Preview on retina screens: Always check sharpness post-compression, especially for dashboards or product UIs.
- Compress with TinyPNG/Squoosh/ImageOptim before Webflow upload.
- Batch with CLI or XnConvert for scale.
- Use SVG/WebP formats strategically.
- Leverage Webflow's responsive features, but don't rely solely on automatic optimization.
Advanced Compression: Leveraging Next-Gen Formats in Webflow
Enabling WebP and AVIF Support
- Uploading WebP: As of 2024, Webflow supports .webp natively in the designer and CMS. Use WebP for all major photos, illustrations, and some UI assets.
- AVIF: Higher compression and smaller sizes than WebP, but requires manual hosting. Upload AVIF to a CDN or external asset manager, then reference via custom code in Webflow.
Using Vector Formats for Logos & Icons
- SVG: Best for logos, icons, and scalable illustrations. Outperforms PNG/JPEG for interface graphics.
-
Accessibility: Always add
aria-labelor<title>tags for screen readers.
Lazy Loading, Responsive Images & Custom Code
-
Lazy Loading: Webflow now supports
loading="lazy"by default in most image elements. Enable this for all non-hero, below-the-fold images. -
Responsive Images: Webflow auto-generates scaled variants. For custom images, use
srcsetvia Embed or custom code for full control:<img src="image.webp" srcset="image.webp 1x, image@2x.webp 2x" alt="Demo UI" width="600" height="300"> -
Fallbacks for format incompatibility:
<picture>
  <source srcset="sample.avif" type="image/avif">
  <source srcset="sample.webp" type="image/webp">
  <img src="sample.jpg" alt="UI screenshot">
</picture>
Potential Limitations & Workarounds
-
AVIF in Webflow: Not supported in asset manager. Host externally and link via
<img>or<picture>. -
Automating format fallbacks: Use
<picture>element for modern+legacy browser support. - Analytical QA: Test all new formats on multiple device/browser combos before launch.
Measuring Compression Success: Tools & Metrics
Compressing images isn’t a “set and forget.” To see ROI, SaaS marketers should regularly audit image impact.
Go-To Audit Tools for Webflow Sites
| Tool | Key Metrics | Why Use It? |
|---|---|---|
| GTmetrix | LCP, image file size, waterfall breakdown | Deep-dive into image contributors to slow loads |
| Google PageSpeed Insights | Core Web Vitals, “Serve images in next-gen formats” | SEO and user experience benchmarks, field data |
| Webflow Audit Panel | Asset warnings, lazy loading prompts, alt text checks | Native, in-editor, fix issues pre-publish |
Interpreting Before/After Data
- File Size Reduction: Track total image weight pre/post optimization. Target: <1.5MB/page for SaaS landers.
- LCP Improvement: A 500ms reduction is common when moving from PNG/JPEG to compressed WebP/AVIF.
| Metric | Before (PNG/JPEG) | After (WebP/SVG) |
|---|---|---|
| Image Weight | 2.7 MB | 0.98 MB |
| LCP | 2.3s | 1.4s |
| PSI Score | 65 | 94 |
Track Progress Over Time
- Schedule monthly audits via GTmetrix/PageSpeed.
- Log image changes, format shifts, and Webflow asset manager exports.
- Trend improvements against organic traffic and conversion rates.
Troubleshooting: Common Image Compression Mistakes in Webflow
- Blurriness after compression: Quality setting too low. Re-export at quality 70–80 for JPEG/WebP.
- Color shift/loss: Color profiles lost in export. Use sRGB for web, check tool settings.
-
Broken formats: WebP/AVIF not showing—likely browser incompatibility or upload method error. Use
<picture>fallback. - Transparency lost: JPEGs don’t support alpha channels. Use PNG or WebP for transparency.
FAQ: Webflow Image Compression
What is the best image size for Webflow?
Aim for images under 500–800 KB, rarely exceeding 1500px wide for hero images or feature illustrations. Most UI icons/logos stay under 50 KB in SVG/WebP.
Does Webflow automatically compress images?
Webflow applies basic optimization and generates multiple resolutions, but does not deeply compress images. For SaaS-level site speed, manually compress images before upload.
How can I convert all my images to WebP?
Use tools like Squoosh (individual), ImageMagick CLI (batch), or CloudConvert/XnConvert (bulk GUI) to convert and download your entire image library to WebP. Upload the resulting files into Webflow.
Will image compression affect SEO in Webflow?
Yes—positively. Faster loads = higher rankings, lower bounce, better Core Web Vitals. Make sure to retain alt text, filename keywords, and metadata where relevant.
Can I restore image quality after compression?
No. Once compressed and artifacts are introduced, quality cannot be recovered. Always keep original, lossless copies of your graphics outside Webflow for future reprocessing.
How do I optimize for retina displays?
Upload images at 2x their display size (e.g. 600px element, upload 1200px optimized image at same file weight). Use Webflow’s responsive and @2x options, or custom srcset for icons/illustrations.
Actionable Takeaways & Conclusion
- Choose the right format: WebP/SVG/AVIF over old JPEG/PNG.
- Compress images before upload using TinyPNG, Squoosh, or batch tools.
- Enable lazy loading and responsive images site-wide in Webflow.
- Audit results with GTmetrix or PageSpeed Insights monthly.
- Never sacrifice UI clarity—always check on retina/displays.
Smart Webflow image compression techniques unlock faster loads, higher rankings, and better SaaS conversions—backed by hard data and Google’s own metrics. Move now, and every page on your site benefits.
Unlimited Design & Webflow Development
Get unlimited design & development requests for a flat monthly rate. Fast turnaround without compromising on quality. No contracts or surprises. Cancel anytime.